
8. Managing Your Family Trees (Tree Section)
The Trees section in LineagePress is the central hub for creating, viewing, editing, and organizing your genealogical data.
🧭 Access: In your WordPress admin dashboard, open the LineagePress menu and select Trees.
Section Overview
The Tree section is divided into three main views accessible via tabs at the top of the page:
- Browse Trees — View a list of all existing family trees.
- Add New Tree — Create a new family tree.
- Edit Tree — Modify the details of an existing family tree.
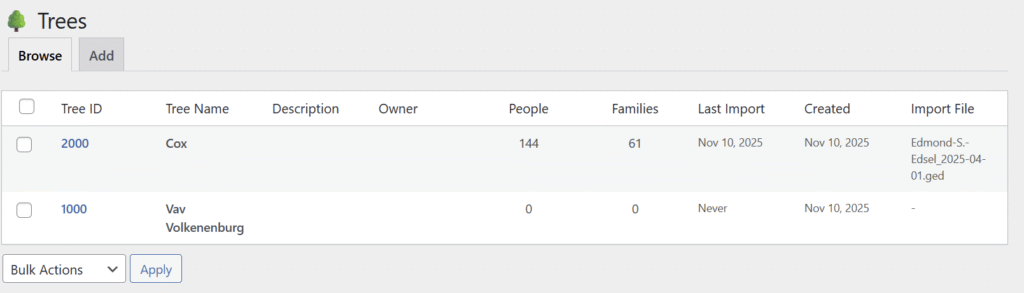
1. Browse Trees
This is the default view and displays a table listing all your family trees.
Visible Columns & Fields
- Tree ID: A unique, short identifier for the tree (e.g.,
coxfamily). Used internally by the plugin. - Tree Name: The display name (e.g., Cox Family Tree).
- Description: A brief description for the tree.
- Owner: The tree owner’s name.
- People: Total number of individuals in the tree.
- Families: Total number of family units in the tree.
- Last Import: Date of the last GEDCOM import for the tree.
- Created: Date the tree record was created in LineagePress.
- Import File: Name of the last GEDCOM file imported into this tree.
Actions & Tools
- Search: Use the search bar to find trees by name or description.
- Edit a Tree: Click the Tree ID or Tree Name to open the Edit Tree page for that tree.
- Bulk Actions:
- Select Trees: Use checkboxes next to each tree or the Select All checkbox.
- Bulk Options (from dropdown):
- Delete Selected: Permanently remove selected trees and all their associated data.
- Clear Selected: Delete genealogical data (people, families, events, etc.) from selected trees but keep the tree records themselves.
- Apply: Click Apply to perform the chosen bulk action.
2. Add New Tree
Create a new family tree record in LineagePress.
⚠️ Note for Free Version Users: The free version is limited to one family tree. To create multiple trees, upgrade to LineagePress Pro.
Fields to Complete
- Tree ID (Required): Unique identifier (short, letters/numbers/underscores only — no spaces or special characters). Example:
smithfamilyorjones_genealogy. This cannot be changed once set. - Tree Name (Required): Full display name (e.g., The Smith Family History).
- Description: Optional longer description.
- Owner: Name of the person who owns/manages the tree.
- Email: Owner’s email address.
- Address, City, State/Province, Zip, Country, Phone: Optional contact information for the owner.
Finalize
After filling in the fields, click Create Tree. If this is your first tree, you’ll be prompted to import a GEDCOM file.
3. Edit Tree
Open the Edit Tree page by clicking a tree’s ID or name from Browse Trees.
Page Contents
- Tree Details Form: Shows all fields entered when creating the tree (Tree ID is read-only). You can update these details and save changes.
- Tree Statistics: Summary of data within the tree, including:
- People
- Families
- Events
- Sources
- Media
- Notes
- GEDCOM Information: If a GEDCOM file has been imported, this section lists metadata such as GEDCOM version, source software, and file creation date.
Actions
- Save Changes: Update the tree record with any modifications.
- Cancel: Discard unsaved changes and return to Browse Trees.
Dangerous Actions (Use with Extreme Caution!)
Located at the bottom of the Edit Tree page. These operations are irreversible — double-check before proceeding.
- Clear Tree Data:
- Purpose: Deletes all genealogical data (people, families, events, sources, media, notes, branches) associated with this specific tree.
- Result: The tree record remains, but the tree becomes empty (useful for re-importing a new GEDCOM for the same Tree ID).
- Confirmation: A confirmation prompt will appear before action is executed.
- Delete Tree:
- Purpose: Permanently deletes the entire tree record and all associated genealogical data.
- Result: The tree and its data cannot be recovered.
- Confirmation: A confirmation prompt will appear before action is executed.
⚠️ Always ensure you have a current backup before performing any “Dangerous Actions.”